Archer Support Requests
The Archer Support Requests app-pack is an offering provided through the Archer Exchange to enhance your existing Archer implementation. The Archer Exchange provides offerings to expand the use of Archer solutions into new business processes and address specific industry, geographic, regulatory, or technical requirements.
Archer Exchange: With the Archer Exchange, the Archer team has created a broad selection of supplemental, value-added offerings to help you get your unique risk management program on the right path, right from the start. You can leverage the Archer Exchange offerings to expand the use of Archer solutions into new business processes and address specific industry, geographic, regulatory, or technical requirements.
On this page
Release notes
|
Release Version |
Published Date |
Notes |
|---|---|---|
|
Archer 2024.11 |
October 2025 |
|
|
Release Version |
Published Date |
Notes |
|---|---|---|
| Archer 2024.06 | October 2024 |
|
|
Archer 6.9 |
April 2021 |
|
|
Archer 6.2 |
November 2017 |
Initial Release |
Overview
Archer enables organizations to automate a wide range of business processes to support their risk and compliance objectives. As adoption grows, it becomes critical to establish a structured approach for managing changes to these processes and the overall Archer environment. By effectively tracking and prioritizing change requests, administrators can respond more efficiently to business needs while minimizing disruption to existing operations.
Organizations can also gain valuable insights through advanced analytics on user feedback and enhancement requests submitted via Archer Support Requests. These insights help identify trends, recurring pain points, and high-demand improvements—enabling more informed, data-driven decisions around prioritization and resource allocation.
Archer Support Requests provides an automated, end-to-end frameworkfor requesting access, proposing new processes, and modifying existing functionality. Each request is evaluated based on factors such as completeness, duplication, business impact, priority, and level of effort. The solution streamlines prioritization, development, testing, and implementation, while giving requestors full visibility into the status of their submissions—enhancing transparency and accountability.
The offering centralizes the intake and management of end-user feedback and enhancement requests, making it easier for organizations to capture and act on ideas for innovation and process improvement. Users can submit suggestions for new business process content, reports, workflows, dashboards and iViews, application enhancements, access requests, and more. By consolidating all requests in one place, Archer administrators can more effectively manage demand and focus on delivering the most impactful improvements.
Key features and benefits
With Archer Support Requests, you will be able to do the following.
-
Automate the Support Request process from start to finish.
-
Centralize all requests to expedite the process and remove the need for email communication.
-
Enable the business user to review the status of any request and track any progress made to that request.
-
Evaluate the request to determine impacts to existing business processes.
-
Estimate the level of effort the request will require.
-
Review approved task list of requests sorted by priority and due date.
-
Monitor the development status of approved requests.
-
Track historical trends by request type or business user making the submission.
-
Request additional information from the business user making the request.
-
Notify all parties involved when the status of a request has changed.
Benefits of using Archer Support Requests include the following.
-
Simplify the process to suggest new innovations or report issues.
-
Quickly request and obtain user access, modification, or removal.
-
Quickly review the status of all Support Requests.
-
Reduce the time required to review, evaluate and prioritize new requests.
-
Reduce the time involved with establishing requests requirements.
-
Escalate high priority requests for immediate action.
-
Prioritize lower cost requests that deliver significant business impact.
-
Eliminate duplicate requests while allowing Business Users to track the record.
-
Plan needed upcoming development work.
-
Quickly complete prioritized requests and release improvements.
User guide
Users: Business User
-
Go to the Support Requests record.
-
From the menu bar, click Archer Support Requests.
-
Under Solutions, click Archer Support Requests.
-
Under Applications, click Support Requests.
-
In the Support Requests, click New Record.
-
-
Enter all pertinent information related to the request in the General Information section.
-
Enter a descriptive Request Title and Description for the Support Request.
-
Select Desired Completion Date by clicking the calendar icon next to the field.
-
Choose a Request Classification by clicking the down arrow next to the field and making your selection.
-
Choose the Request Type by selecting the appropriate radio button.
-
Once you select the Request Type you will notice a new section will open under General Information.
-
Enter all information related to your request by populating the displayed fields.
-
-
(Optional) Select any Watchers you would like to add to the request by clicking
 and selecting their user name.
 -
(Optional) Select a Solution Area for your request
-
(Optional) Add attachments to the record by clicking the | Add New | button in the Attachments section.
-
(Optional) Add additional comments to the record by clicking the | Add New | button in the Comments section.
-
(Optional) Select the BPO Reviewer, Priority, Estimated Level of Effort in the Support Information Section.
-
(Optional) Select any related support requests by clicking the | Lookup | button in the Related Support Requests section.
-
Click Save in the Record Toolbar.
Users: Business Process Owner
-
Select the Support Request you want to review and click the Edit button in the top of the record browser.
-
Add any comments for the Business User or Archer Administrator in the Business Process Owner Comments field in the General Information section.
-
Complete the fields in the Support Information section.
-
If the request has already been made, push the down arrow next to the Duplicate Request field and select ‘Yes’. Select the duplicate request in Related Support Request field.
-
Select the Archer Administrator/Developer in “Assigned To” field to assign the request.
-
Select Estimated Level of Effort and Priority.
-
Enter the Rationale for Level of Effort and Impact to Existing Business process in the respective fields.
-
-
(Optional) Add attachments to the record by clicking the | Add New | button in the Attachments section.
-
(Optional) Add additional comments to the record by clicking the | Add New | button in the Comments section.
-
To approve the request, click the Approve in Actions dropdown.
-
Before approving a Support Request the Business Process Owner should select values for the Assigned To, Estimated Level of Effort, and Priority fields if not already provided.
-
-
To request more information from the Business User, click the Request Additional Information in the Actions dropdown.
-
Requesting Additional Information requires text in the Business Process Owner Comments field.
-
-
To reject the request, click the Reject in the Actions dropdown.
-
Rejected Support Requests requires text in the Business Process Owner Comments field.
-
-
Click Save in the Record Toolbar.
Users: Archer Administrator/Developer
-
Select the Support Request you want to review and click the Edit button in the top of the record browser.
-
Complete the fields in the Release and Deployment section.
-
Enter any comments for the Business Process Owner or Business User in the Archer Administrator/Developer Comments.
-
Select the Build Phase by clicking the appropriate radio button.
-
Select the Scheduled QA Deployment Date, Scheduled Release Date, and Production UAT Review date by clicking the date icon next to the respective fields.
-
Select the QA Review Date, Actual QA Deployment Date and Production Release Date by clicking the date icon next to the respective fields.
-
Complete the QA Approval Captured and Production UAT Approval Captured by clicking the down arrow next to the fields and making the appropriate selection.
-
Enter the new Product Version after development is complete.
-
-
(Optional) Add attachments to the record by clicking the | Add New | button in the Attachments section.
-
(Optional) Add additional comments to the record by clicking the | Add New | button in the Comments section.
-
To complete the request, click the Request Complete in the actions dropdown.
-
To request more information from the Business Process Owner, click the Request More Information in the actions dropdown. Requesting Additional Information requires text in the Archer Administrator/Developer Comments field.
-
To cancel the Support Request, click the Cancel in the actions dropdown. Cancelled Support Requests require text in the Archer Administrator/Developer Comments field.
-
Click Save in the Record Toolbar.
Users: Business User/Business Process Owner
-
Select the Support Request you want to revise and click the Edit in the top of the record browser.
-
Make the revisions requested by the Business Process Owner or Archer Administrator/Developer.
-
(Optional) Add attachments to the record by clicking the Add New in the Attachments section.
-
(Optional) Add additional comments to the record by clicking the Add New in the Comments section.
-
To resubmit click the Resubmit Request in the actions dropdown.
-
(For Business User) To cancel click the Cancel Request in the actions dropdown.
Access Request: control message originated by a business user for the purpose of adding, removing, or modifying a user or groups privileges in Archer.
Application: Database that stores a specific type of data record (for example, policies, assessments, assets, threats, vulnerabilities, controls).
Archer Administrator/Developer: Responsible for executing the request approved by the business process owner. For larger organizations / implementations, the Archer Administrator could be a system engineer that is responsible for configuring business processes, or someone that is responsible for the overall upkeep of the Platform. For medium or smaller organizations / implementations, this person could be the one and only admin for the Platform.
Authorized User: A user who has logged into the system and has a right to perform some operation. The system knows the identity and permissions granted to this individual.
Business Process Owner: Owns the business process in which the change is being requested. They will evaluate the request to determine if it fits in line with the business process' roadmap plan and approve or decline the request, or ask for more information.
Business User: Suggests new innovations and processes improvements for the organization's risk and compliance processes to improve the design, content, and structure. The business user could be any user of the Archer system.
Cross-Reference: A field type that allows users to create associations between records in the same application (internal references) or records in two separate applications (external references). By adding a cross-reference to an application, the system will automatically add a Related Record field.
Dashboard: With reports defined and saved in the inventory of system reports, those identified as Global Reports may be added to dashboards. Each dashboard may include one of many reports in the format they were saved.
Data Feed: Continuous stream of structured data that provides users with current information from one to many sources. Data feeds are typically used by real-time applications in point-to-point settings. Types of Archer data feeds include Archer to Archer data feeds, Database Query data feed, File and FTP data feed, RSS data feed, and more.
Notifications: Emails that are sent from Archer to Users or Groups based on a schedule or a change in the record status.
Record: A collection of field values. Records are stored within applications, sub-forms or questionnaires.
Report: Saved search criteria that you can run again at a later time. In Archer, the construct for reports is a combination of a query and its related output presentation options. The data returned is filtered by a user permissions, allowing users to see only the data for which they have been granted access.
Sub-Form: For one application, administrators may develop multiple sub-forms to hold all related data. Sub-forms may be shared across applications, however changing a sub-form will affect all applications using that sub-form.
Task: Action items that have been assigned to a user in relation to the Support Request.
User: Any person who uses and is registered within the system. In this guide, the user is assumed to be an employee using Archer Support Requests.
User Acceptance Testing (UAT): The last phase of the software testing process. In this phase actual software users test the software to ensure it meets requirements and can handle required tasks. This phase is often referred to as beta testing.
User Profile: Preferences of the registered user that are saved within the system.
Workspace: Display mechanism that provides the user with a way to access their data.
Administrator guide
Prerequisites
|
Components |
Prerequisites |
|---|---|
| Archer solution areas | All |
| Archer use cases | IT Asset Catalog or Business Asset Catalog |
| Archer applications | Contacts |
| Uses custom objects | No |
|
Requires Archer On-Demand Applications license |
Zero (0) Archer On-Demand Application licenses required |
| Archer licensing | Additional licensing fees apply for the Archer Support Request app-pack. Please contact Archer Sales Representative for more information and pricing. |
|
Archer Platform requirements |
Archer Platform Release 2024.11 and later |
| Supported Archer environments |
|
| Partner/vendor requirements | N/A |
| Operating System | Windows |
Components
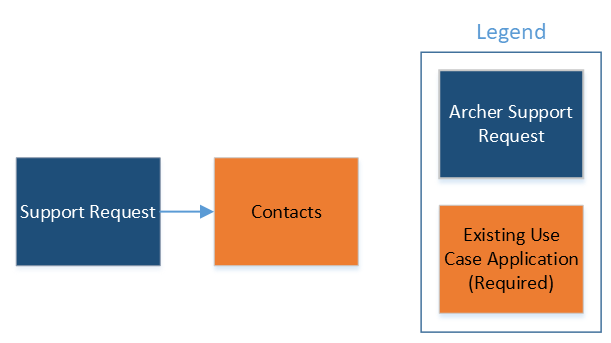
Architecture diagram
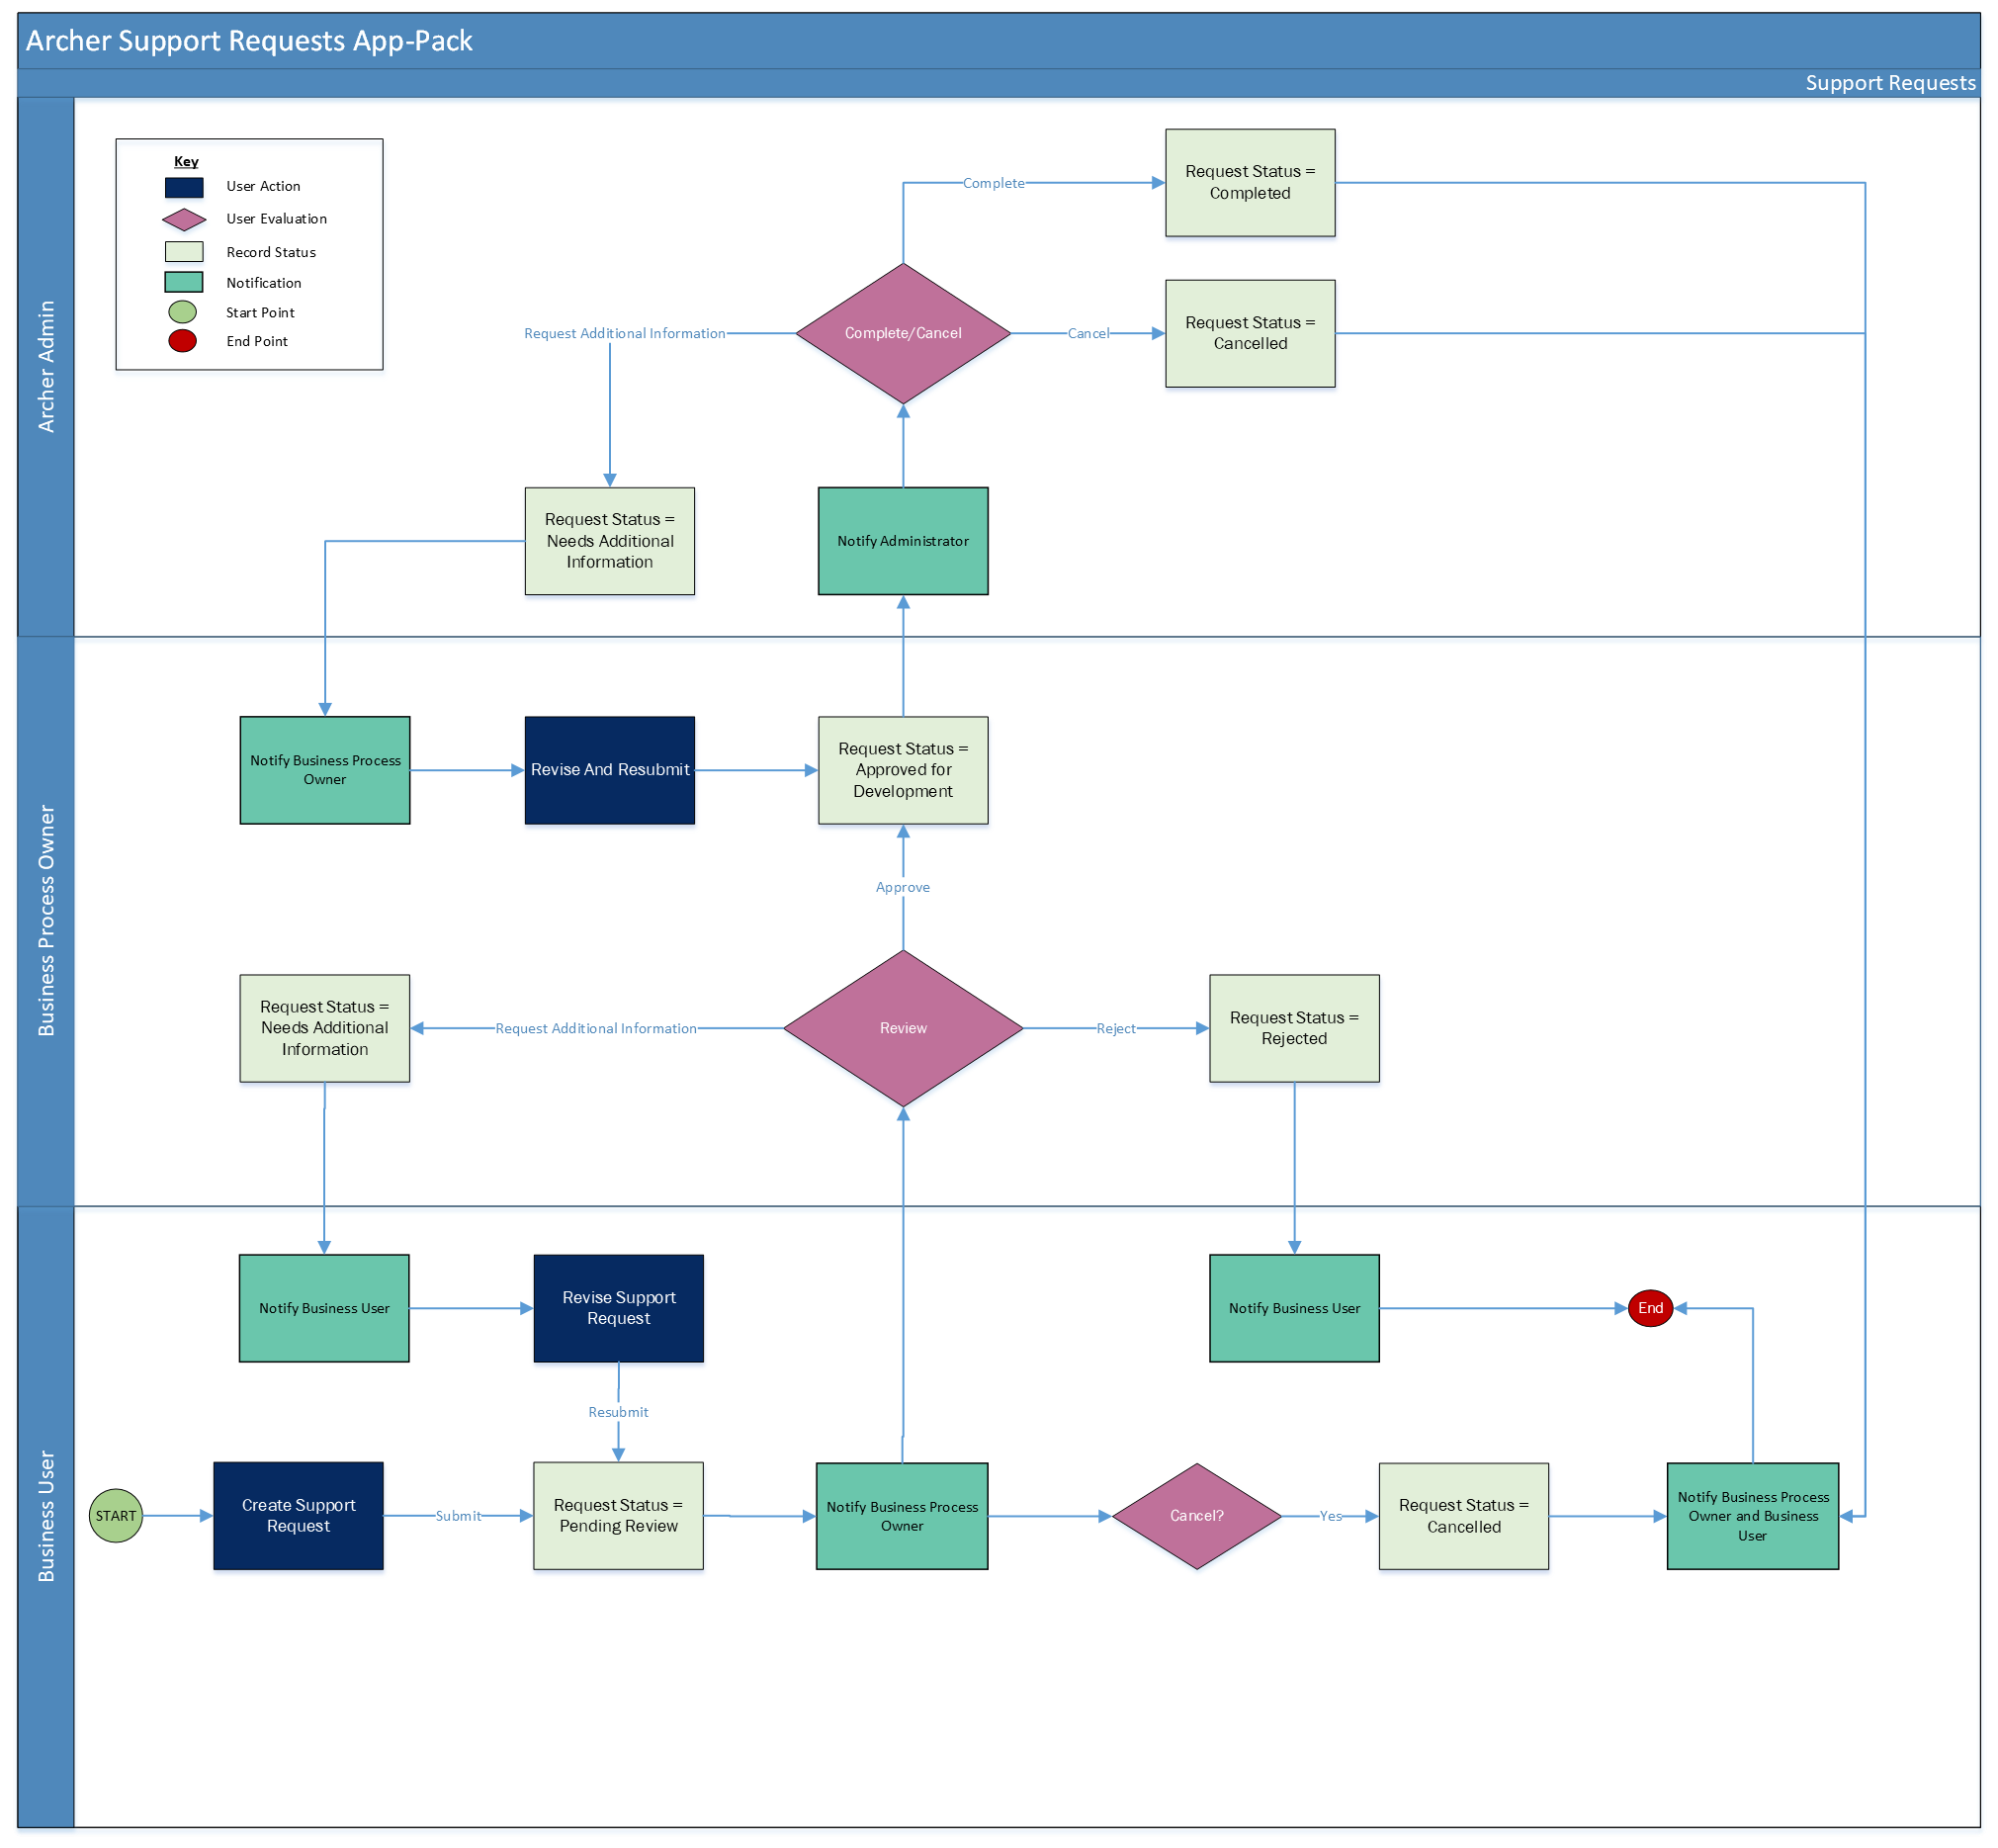
Process diagram
The Archer Support Request process begins when the Business User creates a new record. The Business User then selects which type of Support Request they would like to submit for approval. Once submitted, the Business Process Owner (BPO) receives a notification to review the request. The BPO has the option to approve the request, reject the request, or send the request back to the Business User for more information. If the request is approved it is assigned to an Archer Administrator/Developer for completion. The Archer Administrator can either cancel the request or build/develop the Support Request.
The following diagram shows the general workflow of the application.
Applications
|
Application |
Description |
|---|---|
|
Support Requests |
Captures end-user requests and recommendations for enhancing Archer business processes and use cases. Organizations can more easily manage business team’s ideas for process improvements and innovations by enabling end users to submit suggestions for business process content, ideas for new reports, recommendations for improved workflow processes, proposals for updating dashboards and iViews, specifications for enhancing application layouts, requests for Archer access, and more. In addition, the offering assists Archer administrators to better manage and prioritize incoming requests by centralizing all requests. |
Personas & access roles
The following table describes the functions that make up the application’s organization roles. Depending on the organization of your company, these functions and responsibilities may vary.
|
Function |
Description |
|---|---|
|
Archer Administrator/Developer |
Responsible for executing the request approved by the business process owner. For larger organizations and implementations, the Archer Administrator could be a system engineer that is responsible for configuring business processes, or someone that is responsible for the overall upkeep of the Platform. For medium or smaller organizations and implementations, this person could be the one and only admin for the Platform. |
|
Business Process Owner |
Owns the business process in which the change is being requested. They will evaluate the request to determine if it fits in line with the business process' roadmap plan and approve or decline the request, or ask for more information. |
|
Business User |
Suggests new innovations and processes improvements for the organization's risk and compliance processes to improve the design, content, and structure. The business user could be any user of the Archer system. |
Permissions chart
|
Application |
Archer Admin/Developer |
Business Process Owner |
Business User |
|---|---|---|---|
|
Support Requests |
RUD |
RU |
CRU* |
C = Create, R = Read, U = Update, D = Delete
*Indicates Record Permissions
Upgrade Archer Support Requests
With the release of Archer Support Requests 2024.11, the app-pack has transitioned to a licensed offering. This means it is no longer using Archer On-Demand Applications (ODA).
Organizations upgrading to Archer Support Requests 2024.11 and later will need to follow the steps below:
-
Purchase offering through Archer Sales Representative
-
Refresh the license key upon completion of purchase
-
Download installation package from myArcher
-
Proceed with installation steps below
Upon installation, the ODAs will be converted to core applications.
Note: Before upgrading, it is essential to perform an impact analysis on any customized configurations. A data dictionary is provided to support this process.
Install Archer Support Requests
-
Prepare for the installation.
-
Download the installation package from myArcher.
-
Read and understand the "Packaging Data" section of Archer Help.
-
Apply the latest license file by opening the Archer Control Panel.
-
- Install the package. (If you are upgrading from ODA applications, they will be automatically converted to licensed applications during the installation process.)
- Enable actions by email in your instance (optional).
-
Test the installation. Test the application according to your company standards and procedures, to ensure that the use case works with your existing processes.
Install the package
Installing a package requires that you import the package file, map the objects in the package to objects in the target instance, and then install the package.
There is no Undo function for a package installation. Packaging is a powerful feature that can make significant changes to an instance. Back up the instance database before installing a package. This process enables a full restoration if necessary.
An alternate method for undoing a package installation is to create a package of the affected objects in the target instance before installing the new package. This package provides a snapshot of the instance before the new package is installed, which can be used to help undo the changes made by the package installation. New objects created by the package installation must be manually deleted.
-
From the menu bar, click
 > Application Builder > Install Packages.
 - In the Available Packages section, click Import.
- Click Add New, then locate and select the package file that you want to import.
- Click OK.
The package file is displayed in the Available Packages section and is ready for installation.
Important: This step is required only if FAR Regulatory Correspondence is already present in your system, and you are installing this package.
-
From the menu bar, click
> Application Builder > Install Packages. - In the Available Packages section, locate the package you want to map.
- In the Actions column, click
 for that package.
The analyzer examines the information in the package. The analyzer automatically matches the system IDs of the objects in the package with the objects in the target instance and identifies objects from the package that are successfully mapped to objects in the target instance, objects that are new or exist but are not mapped, and objects that do not exist (the object is in the target but not in the source).
When the analyzer is complete, the Advanced Package Mapping page lists the objects in the package file and corresponding objects in the target instance.
- On the Advanced Mapping page, click to open each category and review the icons next to each object to determine which objects you must map manually.
The following table describes the icons. Icon
Name
Description

Awaiting Mapping Review
Indicates that the system could not automatically match the object or one of its children to a corresponding object in the target instance.
Objects marked with this icon must be mapped manually.
New objects should not be mapped. Select Do Not Map from the drop-down menu to clear this icon for an individual object, or click Do Not Map to clear the icon for all unmapped objects.

Mapping Completed
Indicates that the object and all children are mapped to objects in the target instance, or that they have been marked as Do Not Map. Nothing more needs to be done with these objects in Advanced Package Mapping.
Note: You can run the mapping process without mapping all objects. The
icon is for informational purposes only. - For objects awaiting mapping review, do one of the following:
- To map each object individually, use the drop-down menu in the Target column to select the object in the target instance to which you want to map the source object. To leave an object unmapped, select Do Not Map in the Target column.
- To automatically map all objects in a category that have different system IDs but the same object name as an object in the target instance, click Auto Map. Select whether to ignore case and spaces when matching object names. Click OK.
- To mark all unmapped objects as Do Not Map, click Do Not Map.
-
(Optional) Click
 to enable filter fields that you can use to find specific objects in each mapping category. To undo your mapping selections, click Undo, then select whether to undo all mappings in the category or only the mappings on a single page. If you choose to undo all mappings, you will be returned to the categories list.
 - (Optional) To save your mapping selections and return to the categories list without committing changes to the target instance, click
 .
. - After you review and map all objects, click Execute.
- Select I understand the implications of performing this operation. Click OK.
When the mapping is complete, the Import and Install Packages page displays.
Important: Advanced Package Mapping modifies the system IDs in the target instance. You must update any Data Feeds and Web Service APIs that use these objects with the new system IDs.
All objects from the source instance are installed in the target instance unless the object cannot be found or is flagged to not be installed in the target instance. A list of conditions that may cause objects not to be installed is provided in the Log Messages section. A log entry is displayed in the Package Installation Log section.
- From the menu bar, click > Application Builder > Install Packages.
- In the Available Packages section, locate the package file that you want to install, and click the file name or
 at end of the row to open the Options menu.
 - In the Selected Components section, click the Lookup button to open the Package Selector window.
- To select all components, select the top-level checkbox.
- To install only specific global reports in an already installed application, select the checkbox associated with each report that you want to install.
Note: Items in the package that do not match an existing item in the target instance are selected by default.
- Under the Translation Option drop-down menu, select an option for each selected component. To use the same Translation Option for all selected components, select a method from the top-level drop-down list.
The Translation Option is enabled only when a language is selected.The following table describes the options. Option
Description
Full Install
Installs the component and its translations from the selected languages.
Translations Only
Only installs the translations from the selected languages.
- Under the Install Method drop-down menu, select an option for each selected component. To use the same Install Method for all selected components, select a method from the top-level drop-down list.
The following table describes the options. Option
Description
Create New Only
Only creates new fields and other elements in the applications, questionnaires, workspaces, data feeds, and dashboards specified in the package file. This option does not modify any existing elements on your instance of Archer. This is useful when you want to add functionality to an existing application, questionnaire, workspace, dashboard, data feed, or access role, but you do not want to risk making any unwanted changes to the existing elements of workspaces, data feeds, or dashboards.
Note: The Create New Only option does not apply to access roles or languages.
Create New and Update
Updates all elements in the applications, questionnaires, workspaces, data feeds, and dashboards as specified in the package file. This includes adding new elements and updating existing elements.
Note: The Create New and Update option does not apply to access roles or languages.
- Under the Install Option drop-down menu, select an option for each selected component. To use the same Install Option for all selected components, select an option from the top-level drop-down list.
The following table describes the options. Option
Description
Do not Override Layout
Installs the component, but does not change the existing layout. This is useful if you have a lot of custom fields and formatting in your layout that you do not want to risk losing.
You may have to modify the layout after installing the package to use the changes made by the package.
Note: The Do not Override Layout option does not apply to access roles or languages.
Override Layout
Updates the layout as specified in the package file, overwriting the existing layout.
Note: The Override Layout option does not apply to access roles or languages.
- Click Continue to advance to the next object category in the Package Selector, and repeat steps 4 to 6. After reviewing all object categories, click OK.
- To deactivate target fields and data-driven events that are not in the package, in the Post-Install Actions section, select the Deactivate target fields and data-driven events that are not in the package checkbox. To rename the deactivated target fields and data-driven events with a user-defined prefix, select Apply a prefix to all deactivated objects, and enter a prefix. This can help you identify any fields or data-driven events that you may want to review for cleanup post-install.
- Click Install.
- Click OK.
-
From the menu bar, click
> Application Builder > Install Packages. - In the Package Installation Log section, click the package that you want to view.
- In the Package Installation Log page, in the Object Details section, click View All Errors.
Note: To view individual logs, in the Errors column of the log you want to view, click the Failures link or Warnings link. Clicking View All Errors, Failures, or Warnings opens the specific errors on a different page.
- Click the Export icon to export the log file.
- Click Close.
For a list of packaging installation log messages and remediation information for common messages, see Package Installation Log Messages.
-
Go to the Applications page.
-
From the menu bar, click
. -
Under Application Builder, click Applications.
-
-
In the Applications section, select the Support Requests Application.
-
On the Advanced Workflow Tab, click ‘Activate’ in the top right corner of the page.
-
Then click ‘Save Workflow’ in the top left corner of the page.
Enable actions by email in your instance (optional)
Actions by email can be enabled for your instance if required.
Actions by email enables users to perform advance workflow actions from the email they receive from Archer. Customers can enable Actions by email for Business Process Owner Review. Actions by email needs to be enabled at multiple places before utilizing it:
-
Archer Control Panel: Advance Workflow Actions By Email Configuration should be enabled and updated.
-
Notification: Enable in the on-demand notification template. An on-demand notification template is readily available on package installation.
-
Support Requests Application: Enable Actions By Email in the general tab of the application
-
Support Request Advance Workflow: Enable in the BPO Review user action node and select action by email notification template.
-
User Accounts: Enable in Account Maintenance section of the user account page. Ensure email id is configured for the user.
Certification environment
Date tested: November 2025
|
Product Name |
Version Information |
Operating System |
|---|---|---|
|
Archer Suite |
2024.11 |
Virtual Appliance |