Digital Defense Frontline Vulnerability Manager
Digital Defense’s Frontline Vulnerability Manager™ (Frontline VM) is the industry’s most comprehensive, accurate, and easy to use vulnerability management software. Backed by security research expertise (DDI VRT™), and a highly intuitive user interface touted by customers as simple, insightful, and immediately actionable, Frontline VM delivers unparalleled excellence from deep, accurate network and host assessments all the way to intelligent integration with SIEMs and security workflow management systems. Together, Frontline RNA™ and Frontline VM yield the industry’s lowest false positive rate – critical to effective vulnerability discovery, productive remediation guidance, and ultimately, true cyber risk reduction.
The Digital Defense Frontline VM integration with Archer allows you to combine the power of Frontline’s device discovery and vulnerability detection with Archer’s Vulnerability Management features to view your devices and their vulnerabilities in the context of the business risk they pose to your organization.
On this page
Release history
Last updated: September 2019
About Digital Defense Frontline VM
Benefits
By integrating Digital Defense Frontline VM with Archer, organizations can derive the following benefits:
-
Complete an accurate detailed analysis of devices on network via integration
The end-user will be able to take advantage of Digital Defense’s scan-to-scan host correlation combined with the functionality of the Archer products. Digital Defense’s scan-to-scan host correlation ensures that Archer products receive the most accurate and up-to-date information about hosts that have been scanned, allowing the user to make better, more informed decisions when coupled with information presented by the McAfee products. Digital Defense’s scan to scan host correlation identifies over 25 host characteristics that also include applications that are installed on the host, which helps our mutual customers insure that their host security investments are protecting the environment and data.
-
Deliver an effective path to remediation
Effectively improve risk posture, remediation efforts identified, and prioritized help plan remediation thru recommendations with rule-based policies within Archer.
-
Communicate, collaborate and transform
Ever changing breach landscape, counter measures can be deployed based on risk evaluation information contextualized by Frontline and integrated within Archer.
Requirements
|
Components |
Requirement |
|---|---|
|
Archer Solution |
IT Security Vulnerabilities Program |
|
Archer Use Case |
IT Security Risk Management |
|
Archer Applications |
Vulnerability Scan Results, Devices |
|
Uses Custom Application |
No |
|
Requires On- Demand License |
No |
Prerequisites (ODA and system requirements)
|
Components |
Recommended software |
|---|---|
|
Operating System |
Windows Server 2012 R2 or 2016 Standard or Datacenter editions. |
|
Database Server |
Microsoft SQL Server 2016 SP 1 (64-bit) or 2016 Enterprise Edition (64-bit) or 2017 (64-bit) or greater Note: SQL Express is not supported |
|
Services Server |
Java Runtime Environment (JRE) 8 (64-bit) |
|
Archer |
Archer 6.6 and later |
|
Pre-Requisite Applications |
N/A |
Configure Digital Defense Frontline VM
Before you begin
This section provides instructions for configuring the Digital Defense with the Archer Platform. This document is not intended to suggest optimum installations or configurations.
It is assumed that the reader has both working knowledge of all products involved, and the ability to perform the tasks outlined in this section. Administrators should have access to the product documentation for all products in order to install the required components.
All Digital Defense components must be installed and working prior to the integration. Perform the necessary tests to confirm that this is true before proceeding.
Important: The integration described in this guide is being provided as a reference implementation for evaluation and testing purposes. It may or may not meet the needs and use cases for your organization. If additional customizations or enhancements are needed, it is recommended that customers contact Archer Help for assistance.
Configure Digital Defense
Before integrating Frontline VM with Archer it is first necessary to generate an API key. Perform the steps below to do so.
Task 1: Generate Frontline VM API Key
-
Log in to Frontline VM.
-
In the site header, select your name and choose My profile.
-
On the API Tokens tab, select Create new token.
-
In the Add New Token dialog, type the token name (it can be whatever you like) and select OK.
-
Your token is created. Below your token name, click to show key displays your API key, which you need to integrate Frontline VM with Archer. API Key will appear in this box:
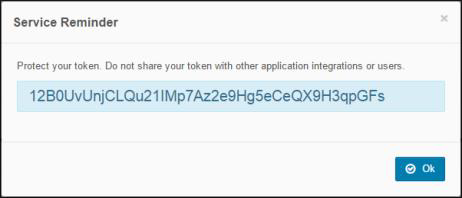
Note: An API key is equivalent to a user's password. Do not use a key with more than one product integration. If you believe a key is compromised, delete the token from Frontline VM immediately by selecting and the resulting check-mark to confirm.
Configure Archer
Task 1: Configuring the Devices Application
Before importing the necessary data feeds for importing vulnerability information, it is first necessary to make a number of changes to the existing Devices application within Archer. To add the DDI Device ID field to the Devices application perform the following steps:
-
Click the down arrow next to the tool’s icon in the menu bar.
-
In the Application Builder section, choose Applications.
-
Choose the Devices application name from the list.
-
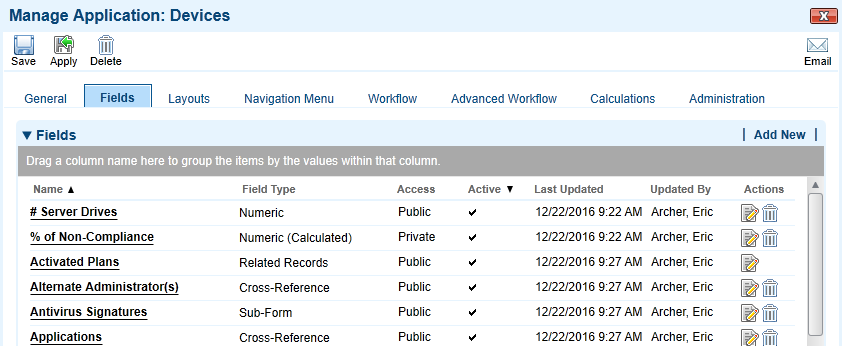
Click on the Fields tab next to General.
-
Click on the Add New link in the upper right of the fields table:
-
Choose the Create a new Field from scratch radio button.
-
Choose the Text field type. Click OK.
-
Enter DDI Device ID for the name. Complete any other fields required by your organization.
-
Click Save above the General tab.
Task 2: Configuring the Vulnerability Scan Results Application
Before importing the necessary data feeds for importing vulnerability information, it is first necessary to make a number of changes to the existing Devices application within Archer. To add the DDI Vuln Instance ID, Source, and Status field to the Vulnerability Scan Results application perform the following steps:
-
Click the down arrow next to the tool’s icon in the menu bar.
-
In the Application Builder section, choose Applications.
-
Choose the Vulnerability Scan Results application name from the list.
-
Click on the Fields tab next to General.
-
Click on the Add New link in the upper right of the fields table.
-
Choose the Create a new Field from scratch radio button.
-
Choose the Text field type. Click OK.
-
Enter DDI Vuln Instance ID for the name. Complete any other fields required by your organization.
-
Click Save above the General tab.
Task 3: Mark the Vulnerability Analyst field as not required
As part of the integration it is also necessary to mark the Vulnerability Analyst field as not required in order for the Data Feed to run without errors. To do this, perform the following steps:
-
Follow steps 1-4 above.
-
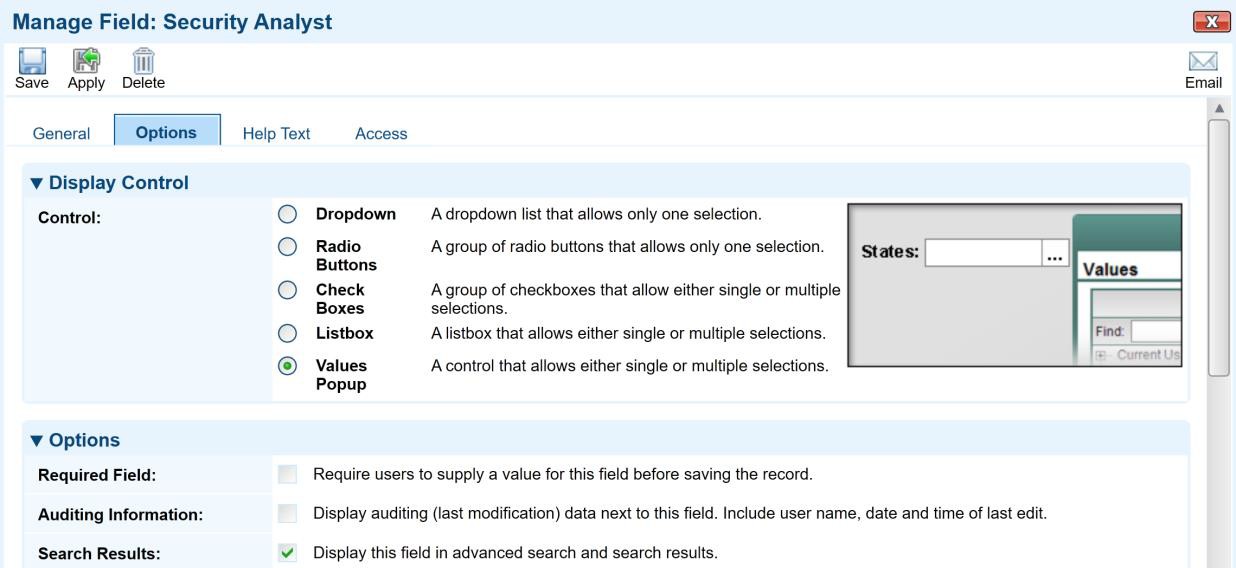
Click on the Vulnerability Analyst field in the fields table.
-
Choose the Options tab. In the Options section of the page, uncheck the box next to Required Field.
-
Click Save above the General tab.
Task 4: Importing and Configuring the Frontline VM Devices Data Feed
Digital Defense Device records are created in Archer via a preconfigured Data Feed. This Data Feed loads the host information from an XML file that is pulled from the Digital Defense APIs using a customer-specific API key. To configure the Data Feed, perform the following steps:
-
On your Archer Server, browse to Administration > Integration > Data Feeds.
-
Select Import and browse to the Data Feed file (Digital_Defense_Frontline_VM_Devices.dfx5).
-
Click on the Transport tab.
-
In the Data Request Properties section, locate the Header Parameter X-API-Token. Replace the Xs in the Value field with your Frontline VM API Token.

-
Click Save above the General tab. Review the mappings on the Data Map tap if needed, the key field definition should be DDI Device ID.
-
Set a schedule for the feed by clicking the Schedule tab. The Frontline VM Devices feed should be scheduled to run and complete before the Frontline VM Vulnerabilities feed.
Task 5: Importing and Configuring the Frontline VM Vulnerabilities Data Feed
Digital Defense Frontline VM Vulnerability records are created in Archer via a preconfigured Data Feed. It will also create the appropriate cross references to existing device records as needed. This Data Feed loads the vulnerability information from an XML file that is pulled from the Digital Defense APIs using a customer-specific API key. To configure the Data Feed, perform the following steps:
-
On your Archer Server, browse to Administration > Integration > Data Feeds.
-
Select Import and browse to the Data Feed file (Digital_Defense_Frontline_VM_Vulnerabilities.dfx5).
-
Click on the Transport tab.
-
In the Data Request Properties section, locate the Header Parameter X-API-Token. Replace the Xs in the Value field with your Frontline VM API Token.

-
Click Save above the General tab. Review the mappings on the Data Map tap if needed.
-
Set a schedule for the feed by clicking the Schedule tab. The Frontline VM Vulnerabilities feed should be scheduled to run after the Frontline VM Devices feed.
Benefits of using the Digital Defense integration with Archer
-
The integration of Digital Defense Frontline VM with Archer IT Security Risk Management enables customers to have a complete analysis of digital asset within their environment an accurate view of the risks. Organizations can proactively identify, track status and manage the repair of critical vulnerabilities.
-
Having the ability to know and report what devices are on your network and how they are vulnerable allows organizations to manage business critical hosts. With the consolidated view, the individual risks can be mapped to multiple hosts, and in addition knowing what vulnerabilities are found within each host.
-
This many to many relationship give’s the Archer Platform an entire vulnerability lifecycle – by providing complete and accurate information for remediation and verification.
Certification environment
Date tested: September, 2019
|
Product name |
Version information |
Operating system |
|---|---|---|
|
Archer |
6.6 |
Windows |
|
Digital Defense |
6.0 |
SaaS |