Swimlane
The Archer integration allows Swimlane to create, read, update, and delete records in Archer, supporting one or two-way record syncing using Swimlane's manual or automated workflows. Integrating Archer with Swimlane supports the centralization of GRC activities and reporting and expedites compliance procedures through automated incident response playbooks.
On this page
Release history
Last updated: February 2017
Overview
The following steps will allow a Swimlane user to import the official Archer Swimlane bundle and use its functionality within their specific workflow or playbook to pull records from the Archer SecOps Security Incidents application.
|
Partner Integration Overview |
|
|---|---|
|
Archer Solution |
IT & Security Risk Management |
|
Archer Use Case |
Security Incident Management |
|
Archer Applications |
Security Incidents |
|
Uses Custom Application |
No |
|
Requires On-Demand license |
No |
Archer configuration
Archer API Service Account Creation
In order for the Swimlane Integration to successfully connect to Archer, a service account needs to be created and set as an application owner for all apps Swimlane is intended to integrate with.
The following steps show how to create and configure the service account used by Swimlane to access the Archer API.
If a suitable user account already exists, skip to the Archer Application Owner Configuration section of this document.
-
From the Archer navigation menu, select Administration > Access Control > Manage Users.
-
Select Add New.
-
Complete all required General tab sections. Make sure Force Password Change On Next Sign-In is unchecked.
-
Save the user, and follow the Archer Application Owner Configuration for all applications to integrate with Swimlane.
Archer API Application Owner Creation
The service account user must be an application owner for each application Swimlane will integrate with, perform the following steps for each application:
-
From the navigation menu, select Administration > Application Builder > Manage Applications.
-
Select the Edit icon on the right for the Security Incidents application:

-
Under the Administration tab, add the service account user to the Application Owners list and click OK:
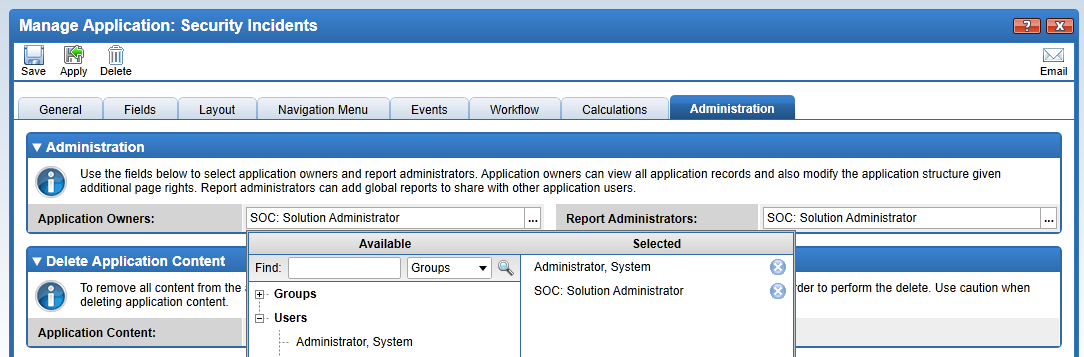
-
Save the Application, and repeat for any other applications to be integrated with Swimlane.
Partner product configuration
Before you begin
This section provides instructions for configuring Swimlane with Archer. This document is not intended to suggest optimum installations or configurations.
It is assumed that the reader has both working knowledge of all products involved, and the ability to perform the tasks outlined in this section. Administrators should have access to the product documentation for all products in order to install the required components.
All Swimlane components must be installed and working prior to the integration. Perform the necessary tests to confirm that this is true before proceeding.
Important: The integration described in this guide is being provided as a reference implementation for evaluation and testing purposes. It may or may not meet the needs and use cases for your organization. If additional customizations or enhancements are needed, it is recommended that customers contact Swimlane Professional Services.
Swimlane Archer Get Record integration
The following steps will provide instructions on how to install, configure, and deploy the Swimlane Archer Get Record integration, supporting manual or automated retrieval of Archer records from the SecOps component Security Incidents application into a corresponding Swimlane application.
-
Login in to Swimlane and switch to Admin Mode:
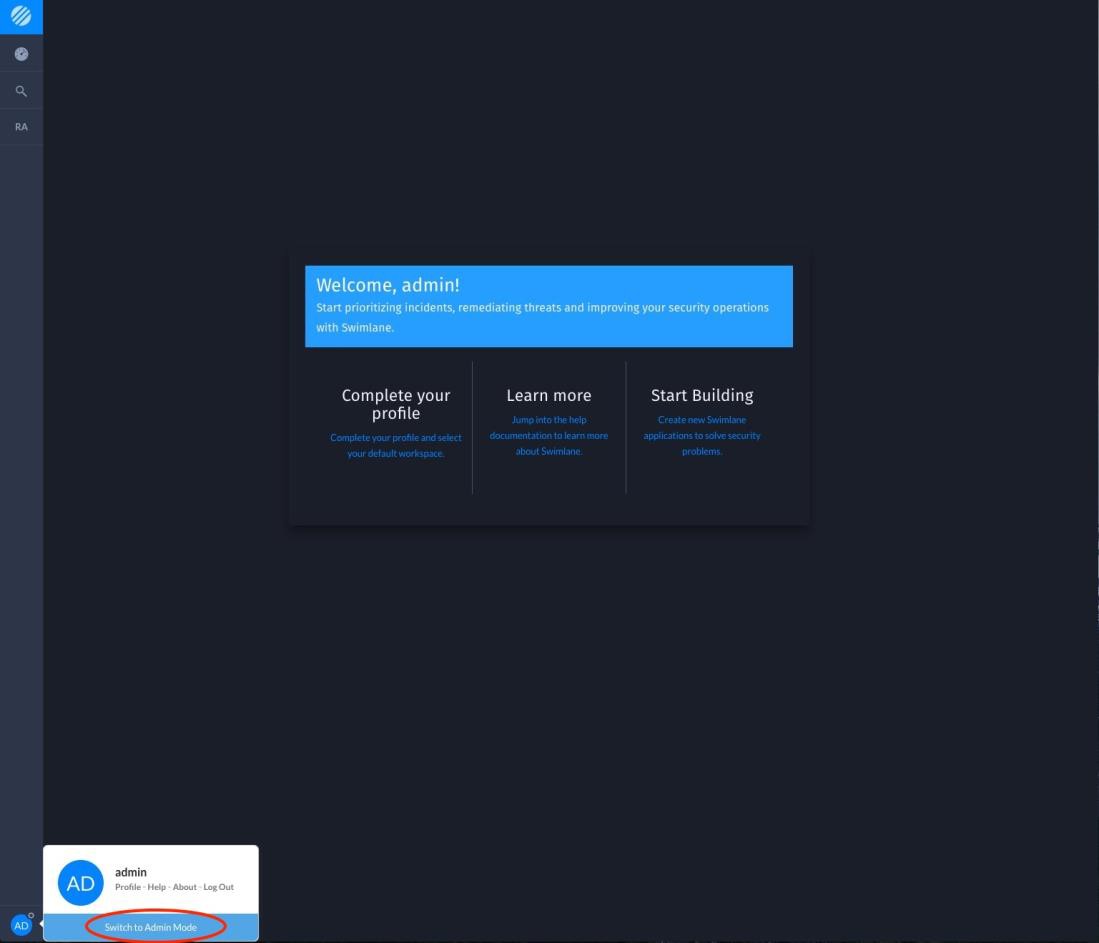
-
Click on the Integrations button on the left toolbar.
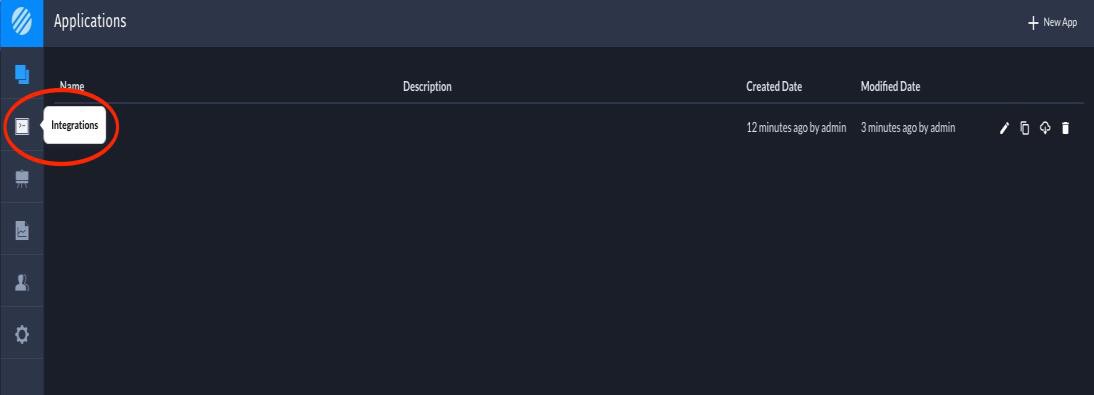
-
Within Integrations, click on Upload Plugins and choose the official Swimlane Archer bundle. You should see the plugin show up once it is installed.

-
Now that the plugin has been installed, we can create an Asset. The Asset designates which Archer instance Swimlane connects to.
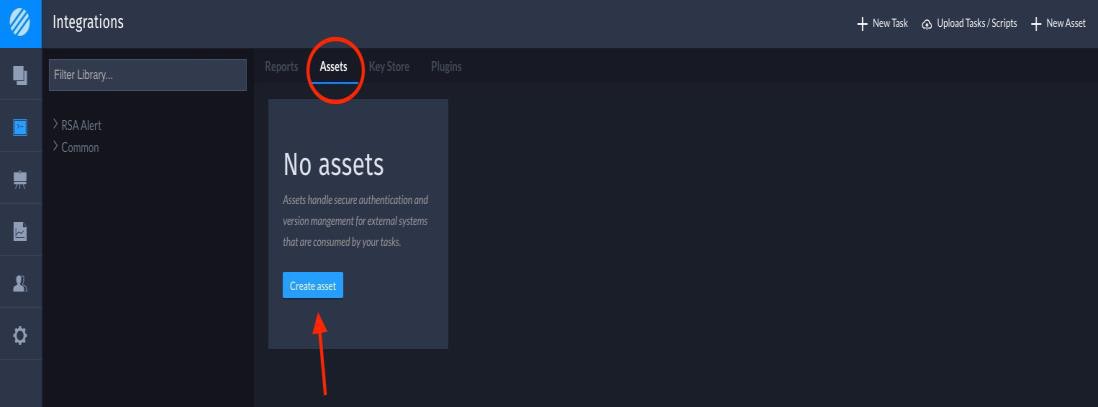
-
Set the asset name and select the asset type, as shown below.
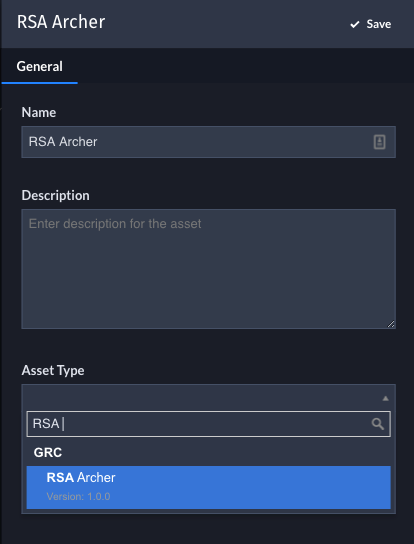
-
Click the Details tab and fill in all required information for URL, Instance Name, Username, and Password. Use the Username and Password of the API service account created in the Archer configuration steps.
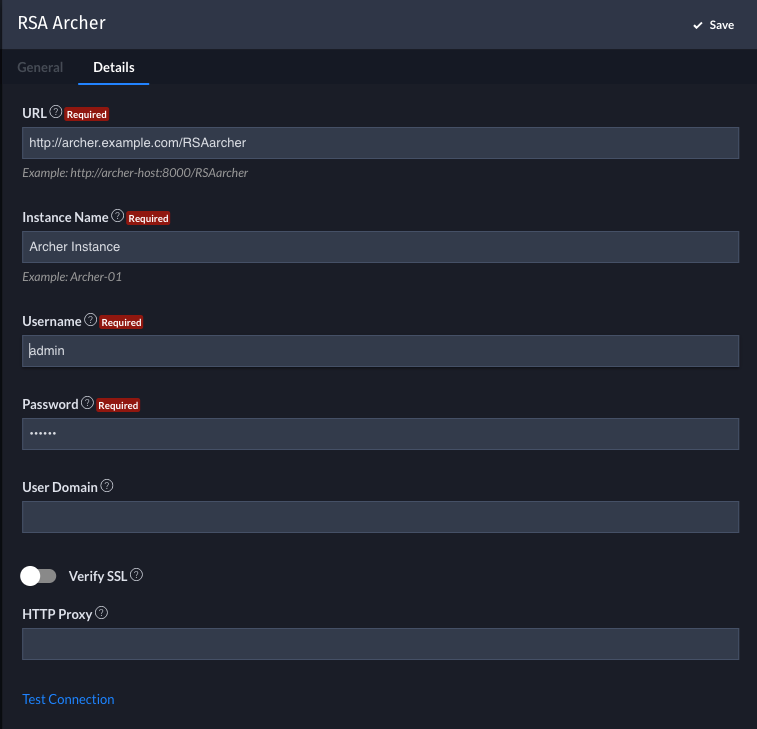
-
Once the Asset is saved, you can now create a task associated with the new Archer Asset. Click on the New Task button, then select the Archer Get Record task.
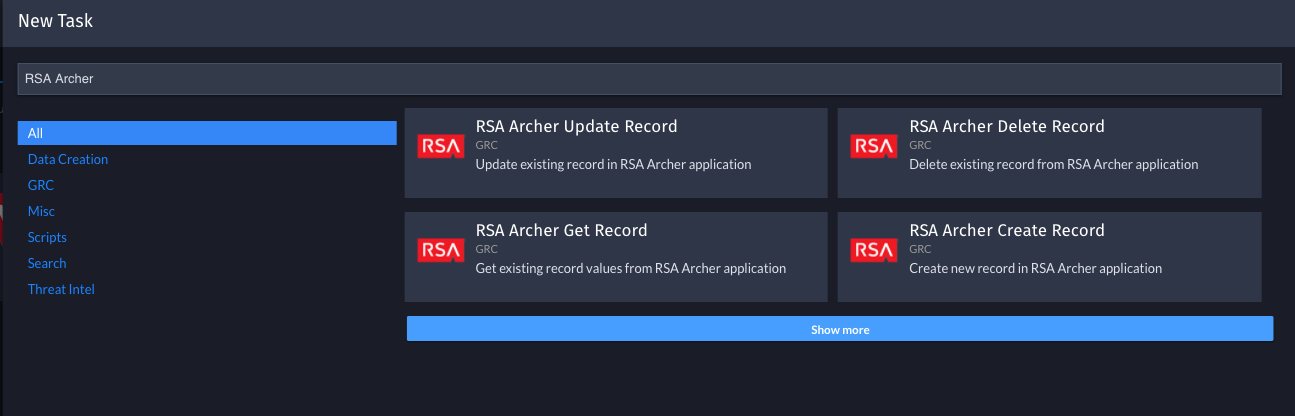
-
Once selected, name the task, select the Related Application, and click Save.

-
Next, set the Asset to the Archer asset that was created in step 4 within the General tab.

-
Now, select the Configuration tab. Set the Application Name to the target Archer application. For most deployments, the ‘Type’ would be set as ‘Static Value’, and the ‘Literal’ would be set to the application title. These could also be configured to pull from a Swimlane record field for more dynamic workflows. Also configure the Record ID, again using either a static value or a Swimlane record field as input.

-
Once the Configuration tab is complete, click on the Output tab. Follow the example to set Output Parameter mappings for one or more of the available fields returned from the integration. Set the output field to the appropriate Swimlane application field to store the returned data.

-
Click on the last tab Triggers. This task can either be run automatically when a record is saved, based on some workflow criteria, or as a manual button configured in the associated application.
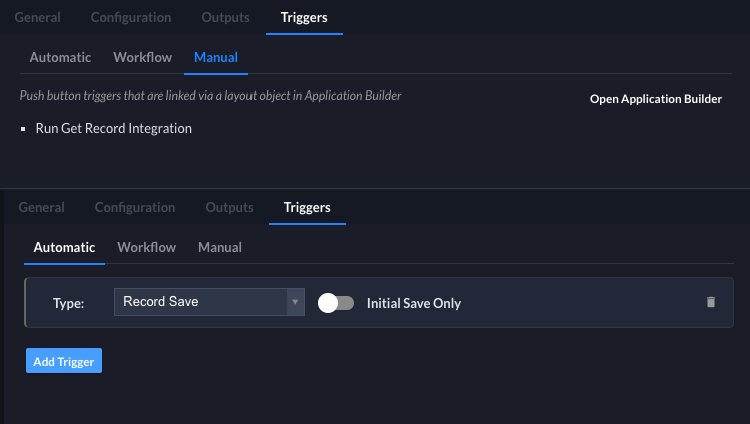
-
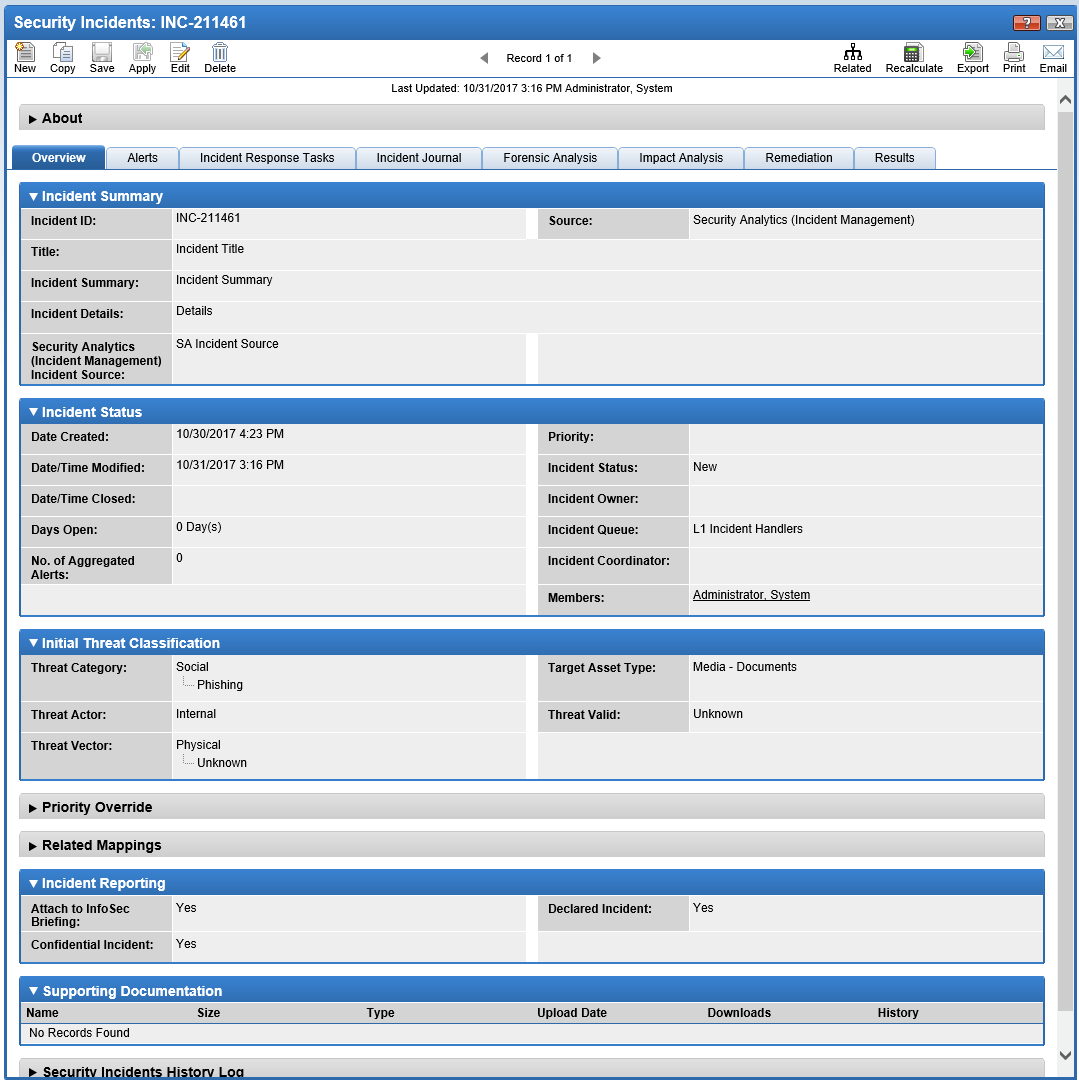
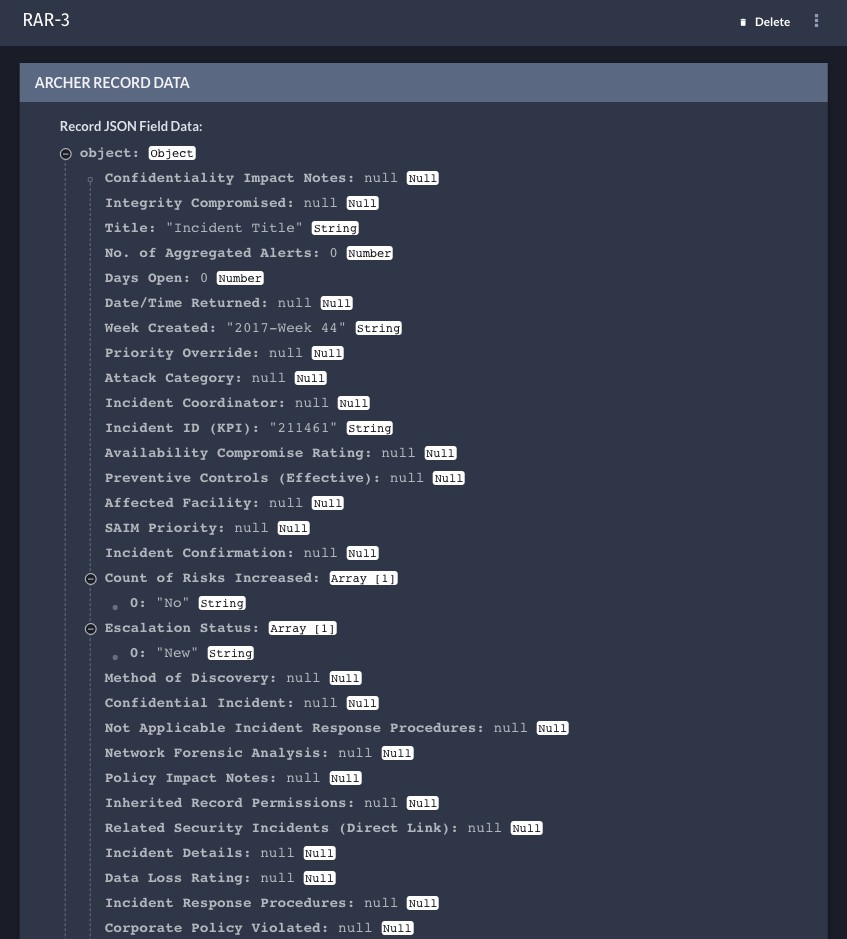
Run the new integration, either manually or automatically depending on the selected trigger configuration, to sync an Archer record into a Swimlane record field. Images below show the target record in Archer and a portion of the available data pulled into a Swimlane record field by the integration.
-
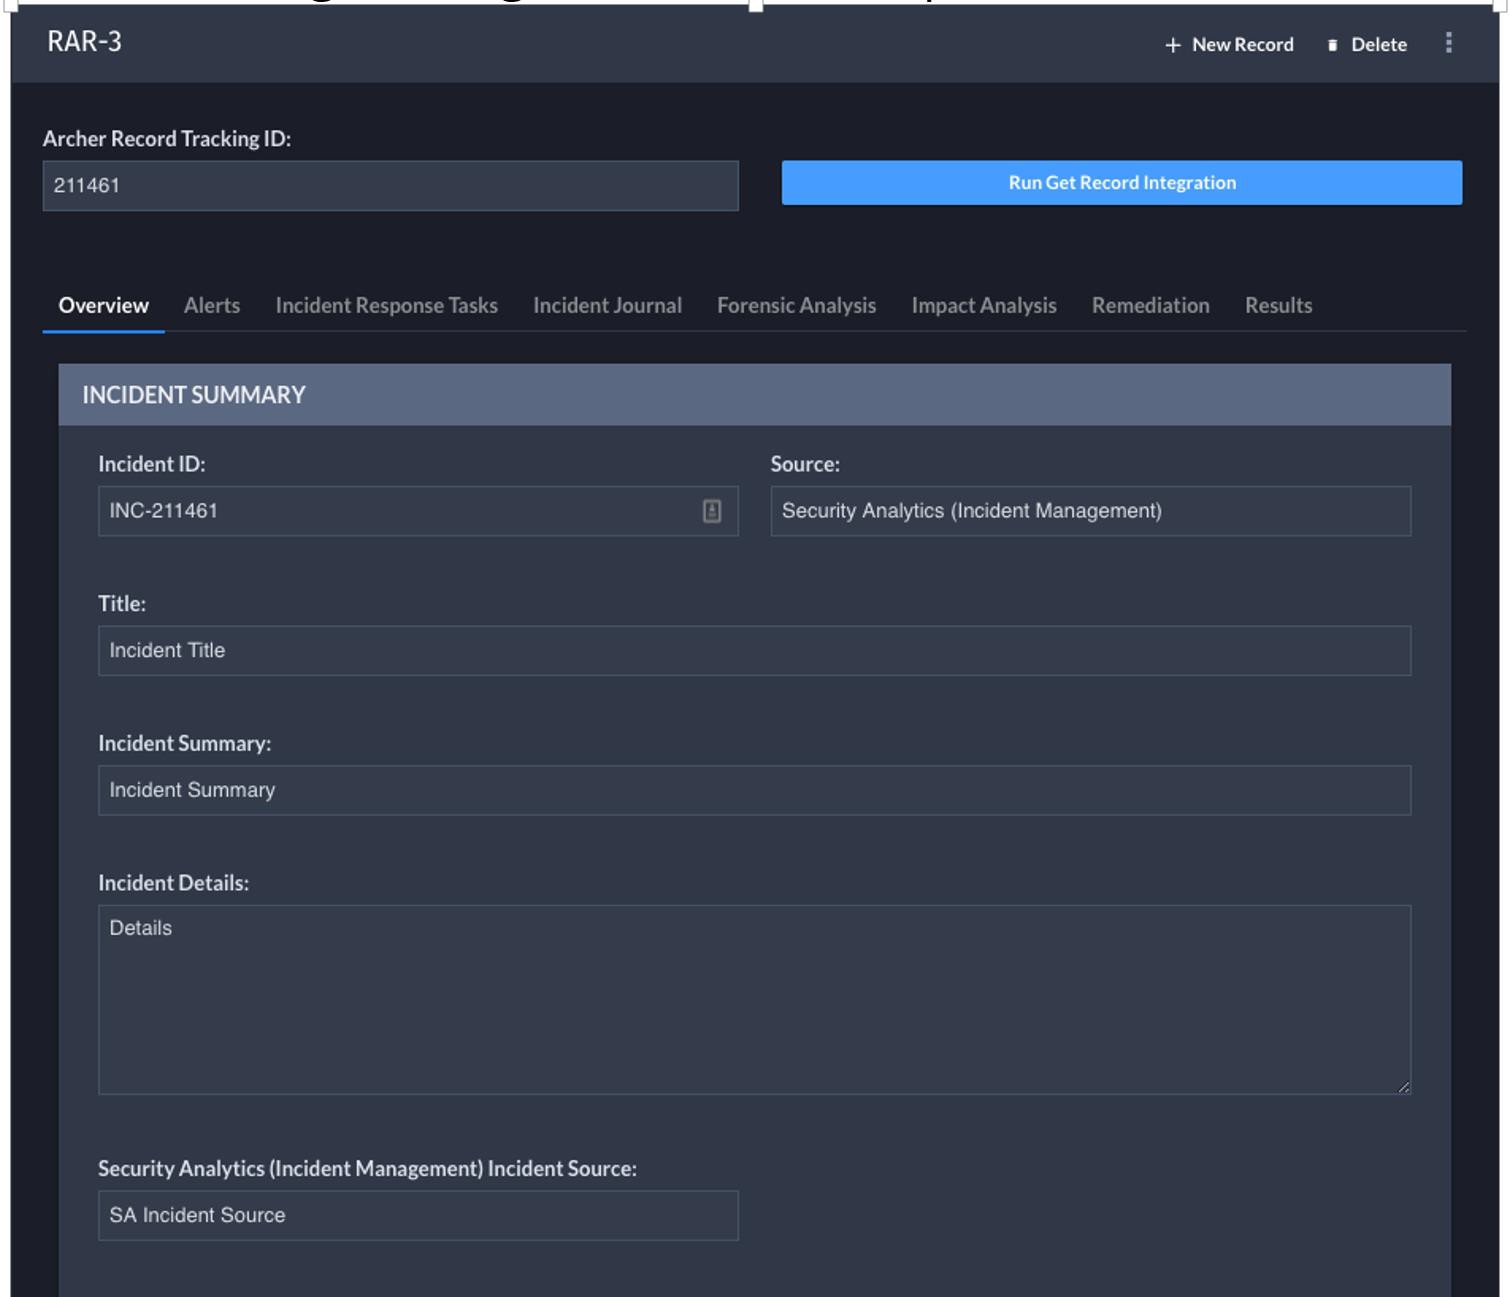
Archer record data can optionally be processed further into individual Swimlane fields through various additional workflow steps depending on the Archer and Swimlane application configurations. The below example shows portions of the Archer Security Incidents app reproduced as a Swimlane application, and the original target record data expanded into individual fields within a Swimlane record.


Certification environment
Date tested: October, 2017
|
Product name |
Version information |
Operating system |
|---|---|---|
|
Archer |
5.5.4 |
Windows 2012 |
|
Swimlane |
2.x |
|