Adding Text Fields
Text fields allow users to enter free-form text. Text fields can be calculated and encrypted.
On this page
Task 1: Create the field
- From your application, go to Designer tab > Layout tab > Objects panel > click
 .
. - Select a field type from the drop-down list, enter a name for the field, and click Create Field.
- If possible, keep names under 20 characters. For example, use Description instead of Description of the Asset.
- Capitalize the first letter of each word in the field name. For example, use Predicted Impact instead of Predicted impact.
- Avoid redundant wording in field names. For example, using the word Asset is unnecessary in the following series of fields: Asset Name, Asset Type and Asset Value.
- Use noun-based field names whenever possible. Avoid verb-based field names, for example, Set Asset Name.
- Do not use the names: Version, Level ID, or Content ID for fields that you add to an application or questionnaire. Field do not display properly with these names.
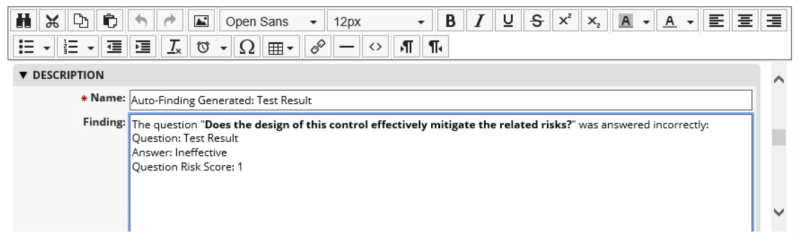
- In the General Information section, enter a description.
Field name guidelines:
Note: When you save the field, the system strips any HTML tags <xml>, <form>, <textarea>, <option>, <select>, <meta>, and <body> that you may have inserted in the description because they may constitute vulnerabilities in the system. The following example shows how you can correct the cascading style sheet (CSS) syntax for the <body> tag so that it will function correctly:
<html>
<head>
<style type="text/css">.c0 { font-family: 'Arial' } .c1 { margin: 0px; background-color: #ffe4e1 } </style>
</head>
<body class="c0">
<p class="c1">This is a text field.</p>
</body>
</html>
Note: Do not use absolute positioning in HTML content.
Task 2: Determine how the field displays
In the Display Control section, select how you want the field to display in the record.
|
Option |
Description |
|---|---|
|
Single line text field |
|
|
Multi-line rich text area |
This option includes the rich text editor that allows users to format the content and paste blocks of text with embedded images.
|
Task 3: Configure options
In the Options section, select all of the following options that apply to this field.
|
Option |
Description |
|---|---|
|
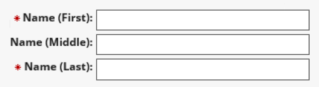
Make this a required field |
Designates the field as required and forces users to enter a value when adding or editing a record in the application. An icon indicates required fields to alert users that they must enter a value. |
|
Display last modified data |
Displays the date and time of the field’s last update, and the name of the person who made the change. |
|
Make this a searchable field |
Makes this field available for display in all search results. |
|
Display this field in global search results |
Makes this field available for display in global search results. This option is only available if this field is set as searchable. |
|
Require unique values |
Prevents users from entering an identical value in a field in separate records. |
|
Make this the key field |
Designates the field as the key field in the application. Search results display the key field as a hyperlink, which users can click to view the details of a record. When you select this option, the required field and search results options are automatically selected. The key field must be on the page layout of the application. After saving the field, you can only clear this checkbox by selecting another field as the key field in the application. |
|
Validate this field when any value changes in the record |
Designates that a field is validated whenever any value changes in a record. If this option is not selected, this field validates only when the value in this field has changed. |
|
Enable bulk update from search results |
Makes this field available for bulk updates from advanced search results. |
|
Enable editing in search results |
Enables the field to be editable in search results and reports. |
|
Make this a calculated field |
Allows users to specify a formula to dynamically compute the field value. For example, you can use the following formula that populates the Date field with the current date: TODAY(). The calculated field displays as read-only for all application users. Each time the field is recalculated, the value updates. |
|
Display advanced formatting options |
Displays the Advanced Field Display Options section, in which you can add descriptive text and alter the standard display of the field. You can set the following options:
|
|
Encrypt data at rest in this field |
See Encrypting Data for instructions. |
Task 4: Set configuration options
In the Configuration section, set the following options:
|
Option |
Description |
|---|---|
|
Maximum characters |
Restricts the number of characters a user can enter in a text field. If you use rich text formatting in a text area, Archer counts the HTML formatting tags embedded in the text as characters, causing a warning message informing you that the text entered in the field exceeds the maximum number of characters. If this condition occurs, set this field to a value higher than the number of characters that you expect to be entered in the field. |
|
Input mask |
Specifies the text format that a user must enter for a text area field. This option is only available if you selected single line text area as the display option in task 2. You can select one of the following masks:
|
|
Field height |
Specifies the height of the field in lines and is specific to a Listbox or Text Area display control. If more values are available for selection in the field than the number of lines you specified, a vertical scroll bar appears in the field to enable users to view all available values. |
|
Default text |
Specifies the default text of a text field. If you want the default text to be removed after a user selects the text field in edit mode, select Remove the default text on focus. The text is not saved with the record, so we recommend this option for only instructional and informational purposes. If you want your default text to be treated as a standard text field entry, do not select Remove the default text on focus. |
Task 5: Configure help text
Field-level help provides additional guidelines and instructions to ensure users enter appropriate information in the field. This Help text displays for users when they add, edit, and view records in the application where the field resides.
Consider the following general guidelines when writing field-level Help:
- Use short, concise instructions that direct the user to take a specific action. For example, "Enter your name" is preferable to "This field is used to enter your name."
- Use complete sentences whenever possible.
- Avoid jargon (unless terms are critical and are familiar to your users).
- Consider the technical aptitude of your audience, and author your help text at a corresponding level.
- Use “you” and “your” as if you are speaking directly to the user.
- Consider posing Help text in the form of a question, for example, "What is your level of interest?"
In the Help text section, do the following:
- Select a display option for both edit and view modes.
- If you are using help text, use the Rich Text Editor to format the text as needed.
| Option |
Description |
|---|---|
|
None |
Help text does not display. |
|
Tooltip Icon |
Help icon displays beside the field in edit and view modes. Click this icon to display the field Help. The application dynamically sizes of the Help box based on the number of characters in the text.
|
|
Below |
Help displays below the field in edit and view modes.
|

Task 6: Configure field access
Access rights determine whether all users or only select users or groups have access to the field.
In the Access section, do the following:
- Select Public or Private.
- If you selected Private, maximize the pane and click
 to select the users and groups to whom you want to grant access.
Note: Key fields must be public.


